Tuesday, December 28, 2010

Puff Pastry Appetizers with Bratwurst and Andouille Sausages

My husband and I don't collaborate often in matters culinary, mostly because my menu making and grocery shopping and dinner starting are all usually done while he's busy at work.  But when we do get together, it's often amazing.

We were tasked with bringing a dish to a family Thanksgiving gathering, and rather than my usual dessert category, I wanted to make an interesting savory appetizer.  With Dear Husband's help, it was decided that I'd start with a puff pastry base and make two incarnations, both laden with sausage: one with bratwurst, and one with andouille (Cajun smoked sausage). 


The bratwurst variation used a special seasonal sausage made with Spaten beer by our local German deli and restaurant, Siegi's.  We used Siegi's for the Cajun version, also.  While choosing our sausages, we tasted a few kinds of cheese available at the deli to determine the best pairings.  Jarlsberg (like Swiss) was chosen for the bratwurst and smoked cheddar was chosen for the andouille.

A test run of cooking helped me decide what other toppings would pair well.  Sauerkraut and onions were a no-brainer for the brats.  The andouille was a little tricker.  Thinking back to my favorite Cajun dishes, bell pepper repeatedly popped up as an ingredient.  I used both green and yellow bells.  I also tried and really liked diced sun-dried tomato- it added richness.

The veggies were sauteed in butter before the diced sausage was added and heated through.  Then the mess was spread onto a sheet of puff pastry and sprinkled with cheese before baking according to the puff pastry package directions.  With the heavy load of toppings, baking times were a little longer than expected, but still worthwhile.

While the puff pastry was a little limp underneath, the overall effect was achieved and the appetizers garnered rave reviews.  Next time, I might put squares of pastry into mini muffin tins and make little pouches instead of a big pizza style sheet.

Spaten beer bratwurst.  Achtung!

Smoked andouille sausage.  Ha eee, I gah-ron-tee!

Andouille with yellow and green bell pepper.

Diced sun-dried tomatoes.

Bratwurst with red onions.

Puff pastry on a parchment-lined cookie sheet.

Bratwurst, drained sauerkraut, red onion, and Jarlsberg cheese.

Andouille, bell pepper, sun-dried tomato, and smoked cheddar cheese.

Roast Beef Sandwiches with Au Jus

For most people, a homemade roast beef sandwich is an elusive delight.  However, with a little know-how, tender and delicious meaty goodness can be yours at home.

It all starts with time and a good cut of beef - arm roast, in this case.  A chuck roast would work, as well.  You want a thick, well-marbled piece of beef, and you want to season it gently and cook it slowly so that the lovely fat and connective tissue inside can work their magic.

A cast iron Dutch oven is a must for any cook, I've come to find.  When I received one as a Christmas gift years ago, I was doubtful about how often I'd actually use it.  Little did I know.  It's one of my favorite pots now, glossy and seasoned to perfection, and perfect for making delectable pot roast.

I started with about a 2 1/2 pound arm roast, purchased from a local family-owned farm- fabulous grass-fed, hormone free Oklahoma beef (no more grocery store crap for us, tyvm).  I slathered the roast with a paste of kosher salt, fresh black pepper, minced garlic, chopped rosemary, and extra virgin olive oil, plunked it down in the Dutch oven, slapped on the lid, and threw the whole thing into a 350º oven.  (My, that was some violent cooking!)

After about 3 1/2 hours, the meat was tender and tasty.  While it cooked, I prepared the rest of the goodies for the sandwiches: caramelized red onions and crusty rolls with Swiss cheese.  The onions are sliced fairly thick and sauteed in butter over medium-low heat until softened and slightly browned.  Crusty French rolls are split, buttered, toasted, and dressed with Swiss cheese that is then melted under the broiler.

When the meat was ready, I set the roast aside, strained the pan juices into a saucepan, added some beef broth (hot water and a bouillon cube), and brought the liquid to a simmer.  Taste, adjust seasoning with salt and pepper if needed.  Slice the roast with a serrated knife across the grain into 1/4" slabs, layer onto the toasted and cheesed rolls, top with onions, and serve with cups of au jus gravy.

Oh hell yes!

Pepper, kosher salt, minced garlic, and minced rosemary.

Lovely bit of beef.

Making the tasty paste for the meat.

Slathered, smothered, and covered.

Yay for beef!!!  I made a semi-healthy avocado pico de gallo salad to balance the meaty overload.

Monday, December 27, 2010

Neapolitan Style Limoncello

A Facebook link to this blog post last month intrigued me.  The post is all about making homemade limoncello, an Italian style lemon liqueur.  With the holiday party season fast approaching, I jumped at the chance to make a tasty libation for sharing.  Booze, lemons, sugar...what's not to love, right?

The limoncello itself is super easy to make.  The only thing you need to have is patience.  It takes about 30 days to steep the lemon peels, and I'd recommend heartily that you give your finished limoncello at least another week to mellow before serving.  There's a noticeable difference in flavor after a week- less hellfire and more lemony sweetness.

The magic all starts with grain alcohol- the revered and feared Everclear.  Everclear is mighty powerful stuff, and although it's diluted by half with sugar syrup, it'll still knock you on your ass if you're not careful.  I dunno if there's a connection, but I served this stuff at a party last weekend and there was very nearly a drunken brawl shortly thereafter.  Don't say I didn't warn you.

Anyhoo, on with the show.  Check the link above for the actual recipe.  It turns out I used 750mL of Everclear instead of the 1L called for, but it's so stout, I doubt I'd use a whole liter next time.

Limoncello is delicious as an aperitif or as part of a mixed drink.  Keep a bottle in the freezer, because it tastes best ice cold.  I like mine mixed with Sprite and ice.  I think it might also be good in a champagne cocktail.  Although I can't in good conscience recommend it, it's a fantastic shooter as well.

Removing lemon zest with a vegetable peeler- by far the easiest way.

Don't scrape into the bitter white pith.

Illegal in some states.

Good time to use that glass pickle jar you've been holding on to.  Let the peels soak in the booze for a good month.


Easy peasy, lemon squeezy.  I made a big ass pitcher of lemonade with the juice.  Nothing wasted!

The lemon peels have been seriously dessicated after 30 days in Everclear.

Lemon-tinged Everclear.  A most unappetizing color at this stage.

750 grams of sugar for simple syrup.  Thanks for jacking my pics up, Blogger.

One liter of water for simple syrup.

After boiling the simple syrup, remove from heat, add lemon peels, and let cool.

Mixing the two parts together.  Notice the lovely milky yellow hue.

Grolsch beer bottles work great because of the nifty flip tops, and my husband was kind enough to drink some of his beer for me so I could have them.  I filled four bottles, which are 16 oz. each.

After straining the lemon peels from the simple syrup, I tossed them with sugar and allowed them to dry.  Well, I allowed most of them to dry.  They were so delicious I ate a bunch while they were damp.

Holy crap, do I suck at blogging.

Yep.  I suck at blogging.  It's been since the beginning of November that I last posted.  /facepalm

My apologies, minions.  It's not that I haven't been cooking, and I have taken some pictures with the intent of posting.  I guess the impetus to actually write about it hasn't been with me this holiday season.  So please, forgive me, and check back over the next couple of days for some real updates.

Coming soon are posts about making Neapolitan style limoncello, beef stroganoff, stromboli, puff pastry appetizers, roast beef sandwiches, and more.

Thanks for still reading!

Tuesday, November 9, 2010

Pumpkin Cheesecake Dip


I volunteered to bring a snack for tonight's meeting of Tulsa Cake Club, and this is the result...pumpkin cheesecake dip.  Easy.  Autumnal.  Pumpkiny.  Sweet and gently spiced.  What's not to love?

I saw this recipe online somewhere a few weeks ago, cut and pasted the directions from the website into Word, and printed it out, so I couldn't tell you where it's from.  Sorry, original recipe person!   Also, I made a couple of adjustments in the form of adding cinnamon and vanilla.

Anyway, this stuff is awesome with gingersnap cookies and sliced apples.  Pictured are slices of a Gala apple, but any not-too-sweet kind will do.  I'm noshing on some Golden Delicious right now with a dollop of the dip.

Pumpkin Cheesecake Dip
Serves 8-10

1 (8 ounce) block cream cheese, softened
1 cup pumpkin puree
1 1/2 cups powdered sugar
1 tsp. pumpkin pie spice
1/2 tsp. ground ginger
1/4 tsp. ground cinnamon
Dash vanilla
1-2 tbsp. heavy whipping cream, optional  (I didn't need any.)
Gingersnaps and/or fresh fruit for serving  (I used apples.  Pears would be good, too.  So would graham crackers.)

Beat the cream cheese and pumpkin with a mixer until smooth.  Add the powdered sugar 1/2 cup at a time until incorporated.  Add the spices and vanilla.  If the mixture seems too thick, add some of the whipping cream to thin it out.  Chill thoroughly before serving.


It occurs to me as I'm finishing this post that the leftover dip I brought home from my meeting would be quite tasty as a topping for tomorrow morning's toast or bagel...hmm...

Homemade Green Bean Casserole

Green bean casserole is a longtime favorite of mine, and it's pretty much universally popular as a Thanksgiving side dish.  Are you sad that you're relegated to the old standby of globby canned cream of mushroom soup, limp green beans, and greasy French-fried onions?  Think again.  You can make this deliciousness from scratch, and it's very easy.

All you need are:

~ 3 cups fresh green beans, washed and broken into pieces 1 1/2" to 2" long
~ 1 tsp. fresh thyme, minced
~ 2 shallots or 1/4 of a red onion, diced
~ 4 oz. cremini mushrooms, washed and diced
~ 2 cloves garlic, minced
~ 2 oz. unsalted butter (half a stick, 4 tbsp.)- divided
~ 2 tbsp. all purpose flour
~ 2 cups milk
~ 1/2 cup panko (Japanese style bread crumbs)
~ kosher salt and fresh black pepper

Place the green beans in a shallow pan with about 1/2" of water.  Cover, bring to a boil, and cook until just bright green.  Drain off the hot water and dump the beans into a bowl of ice water.  Set aside.

Saute the chopped mushrooms, shallots, garlic, and thyme in 2 tbsp. unsalted butter over medium heat.  Season with salt and pepper.  Stir in the flour and mix thoroughly.  Slowly add the milk while stirring and cook until thickened.  Season to taste and add the drained green beans.  Heat through.

Preheat the oven to 400º.  Put the green bean and mushroom mixture into an 8" baking dish.  In a small bowl, melt the remaining 2 tbsp. of butter.  Toss with the panko and spread the buttered breadcrumbs on top of the green bean mix.  Bake until bubbling and golden brown.  Cool slightly before serving.  Serves 4-6.

Fresh green beans were first broken into 1 1/2" to 2" pieces, and then steamed in a small amount of water until bright green.

See the pretty bright green color?  Drain off the hot water and toss those puppies into a bowl of water and ice.  This stops the cooking and retains crispness.

Saute some chopped mushrooms, thyme, shallots, and garlic in butter with salt and pepper.  Add flour and combine thoroughly.

Stir in some milk and cook until thickened.  Adjust seasoning and add green beans.

Mix together some panko bread crumbs and melted butter for a crunchy topping.

This is an 8" round baking dish.

Bake until golden and bubbly.  In hindsight, a cup of panko was too much topping for this small batch.  Half a cup should suffice.

Om nom nom nom!

Tuesday, October 19, 2010

Happy Not Yet Thanksgiving!

My husband is head-over-heels for a full bore turkey dinner with all the trimmings.  Thankfully, so am I, because this meal is definitely time-consuming.  Once fall hits, it's hard not to make a big special meal outside of the holiday celebrations.  I have a big family, and my aunts and grandmothers are often the ones preparing the special dinners.  With the use of bone-in turkey pieces, however, I can make a real turkey dinner for just the three of us.

The technique I use for turkey was featured on America's Test Kitchen.  Go on over there and git yerself a membership.  It's well worth it!

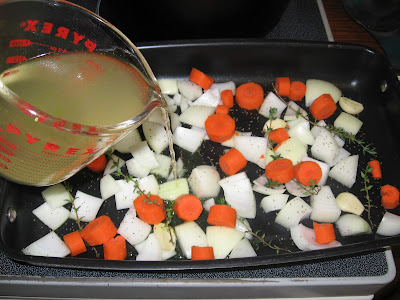
The turkey preparation basically involves slow roasting a bone-in breast (plus thighs and drumsticks, for a larger crowd) on a rack over chopped veggies, herbs, and broth, followed by a resting period and then broiling for crispy skin.  The turkey-and-veggie infused broth from the roasting pan is then turned into the most singularly delicious gravy I've ever made.

On the side, I made some mashed potatoes, pumpkin pie with homemade whipped cream, steamed green beans, and cornbread dressing.  I also opened a can of jellied cranberry sauce, a great pantry stand-by if you aren't in the mood to make your own.

My cornbread dressing is the same that my late stepmother used to make, and it's not so much a recipe as it is a method.  It's easy, delicious, and makes great leftovers.

Cornbread Dressing
Serves 8

2 boxes Jiffy cornbread mix, prepared according to package directions, baked, and cooled (You can do this the night before and let it sit, covered, on the counter.)
1 lb. pork sausage, regular or sage flavored
1 cup white onion, diced
1 cup celery, diced
2-3 cups chicken broth
Garlic powder or granules
Poultry seasoning

Crumble the cooled cornbread into a large mixing bowl and break it up with your hands.  Heat a large skillet over medium-high, add the sausage, and cook until nearly browned through, breaking up pieces with a wooden spoon.  Add the diced onions and celery to the sausage.  Sprinkle on some garlic powder and poultry seasoning and stir well.  Add about a cup and a half of chicken broth and bring to a simmer.  Cook until the onions become translucent.  Taste and adjust seasoning with more garlic and poultry seasoning if needed.  Transfer the sausage mixture to the bowl with the cornbread and mix with a wooden spoon until moistened.  Add more broth as needed until the mixture is completely moistened and sticky.

Transfer to a 9" square baking dish, spreading with a spatula to level.  Bake, covered with foil, in a preheated 400º oven for about 20 minutes.  Remove the foil and bake for another 20-30 minutes until the edges are browned.  Serve.

Turkey breast basted with melted butter and seasoned with salt and pepper.

Roasting pan of vegetables, herbs, and broth.

The turkey roasts skin-down for the first hour, then is flipped over until done.

Carving the boid.

I suck at making pretty pie edges, so I rolled the excess dough and used tiny cookie cutters to make the border.

I adhered the leaf shapes with a little water.

See?  Purty!

Whipped cream beaten into submission.

*Drool.*

Huzzah!

Saturday, October 9, 2010

Farmer's Market Haul, $40 Compost Bin!


I made the drive to downtown Broken Arrow, a lovely suburb of Tulsa, this morning to visit their farmer's market and take advantage of not only some tasty local produce, but a compost bin special offered by the Metropolitan Environmental Trust, the area group that heads up recycling and environmental education efforts.

I bought the Garden Gourmet compost bin for $40, nearly half price.  Wahoo!

Sadly, the farmer's market season in Oklahoma is pretty much over, but I got some very photogenic produce today- locally grown zucchini, red potatoes, green beans, jalapeños, and sweet green heirloom chiles that originated in Italy but I didn't catch the name of.  And, I sampled some yummy smelling hand lotion from Cheeky Munky Soap Company.

My drive home was filled with culinary inspiration brought upon by my purchases.

The zucchini will probably be sauteed as a side dish and possibly turned into bread or muffins.  The jalapeños will be used in some Mexican dishes, which I love to eat any day of the week.  I may even get a wild hair and make a batch of my Uncle Frank's special salsa.  The red potatoes will be roasted with the sweet chiles for a first attempt take on papas con chile.

The huge batch of green beans will be divided into two dishes- steamed, and as delicious homemade green bean casserole.  I've planned it in my head: béchamel sauce, lots of diced mushrooms, blanched green beans, shallots, garlic, and a little thyme, baked with a topping of buttery bread crumbs.  Yum!

Chicken Parmesan, Baked Ditalini, and Bruschetta

Chicken Parmesan is one of those dishes that so many Italian restaurants do poorly, but it's ridiculously simple.  I can't tell you how many times I've had one that's greasy, over-sauced, and dripping with too much melted cheese.  You can eat a breaded chicken breast that's not completely unhealthy!

Chicken Parmesan
Serves 4

4 boneless, skinless chicken breasts, patted dry
1/2 cup dried bread crumbs
1 egg, beaten with a bit of milk
1/2 cup all-purpose flour
1/2 cup finely grated Parmesan cheese (PLEASE don't use the crap in the green can!)
1 Tbsp. dried Italian herbs, or 1 tsp. each dried basil, oregano, and marjoram
Kosher salt and fresh black pepper
Olive oil
Homemade or jarred pasta sauce, about 2 cups
Additional grated Parmesan cheese, if desired, for serving

Heat oven to 400º.  Drizzle olive oil into the bottom of a 9" x 13" baking dish to coat.

Place the flour on a dinner plate and season with salt and pepper.  Put the beaten egg and milk in a shallow bowl.  Mix the dried herbs and Parmesan cheese with the bread crumbs in a separate shallow bowl.

Working one at a time, dredge each chicken breast into the seasoned flour, shake off excess, dip in beaten egg, and roll in breadcrumb mixture, pressing to adhere.  Place each breaded breast in the prepared baking dish.

Bake until the edges and tops of the chicken are golden brown and juices run clear, about 20 minutes.  While the chicken is baking, simmer the pasta sauce in a small pan until slightly thickened.

Serve each chicken breast with some sauce spooned over, and sprinkle on additional grated Parmesan, if desired.

Chicken Parmesan and baked ditalini


On the side of chicken parm at restaurants is usually a pile of spaghetti marinara.  My husband asked for some baked ziti or something similar, and so I made this simple dish.  He prefers baked pasta that is not loaded down with cheese, and that is heavier on tomatoes.

Instead of ziti, I used ditalini, which are tube-shaped like ziti but much shorter, making them kid-friendly and good for soaking up all the sauce.  I simply boiled about a cup of dry pasta in salted water until it was *almost* done, mixed it in a shallow baking dish with a generous amount of pasta sauce, covered it with foil, and baked it alongside the chicken.  After it was hot and bubbling, I tossed some Parmesan on top.

For an appetizer, we went further with the crazy tomato goodness by having bruschetta on fresh French bread.

Bruschetta (say it correctly, please- broos-KET-uh, not broo-SHET-uh) is super simple and very customizable.  I diced 3 tomatoes, finely chopped 2 garlic cloves, and mixed in some freeze-dried basil, olive oil, salt and pepper, and a splash of balsamic vinegar.  After chilling briefly, the concoction is spooned over slices of crusty bread.  You can toast the slices first with a drizzle of olive oil, if desired.


Buon appetito!

Cashew Butter Chocolate Chip Cookies

My adorable kitchen assistant, Eva, is sadly allergic to peanuts.  Fortunately, she is able to eat tree nuts.  She will eagerly scarf down pecans, cashews, walnuts, almonds- you name it.  I happened upon a marked down brand of salted cashews at the grocery store a couple of weeks ago and picked up 2 boxes.  One was eaten as snacks, and the other was destined to become cashew butter for cookies.

While cashew butter is often available on grocery store shelves, it's usually unsalted, and in my opinion, a bit bland.  I tossed the whole container into my food processor, held onto the handle (the processor has a tendency to dance around), and blended them until I got the smoothest consistency I could manage.  You could always stir in some chopped cashews after blending for a chunkier consistency.

I used my old standby peanut butter cookie recipe out of my red and white checked Betty Crocker cookbook and substituted an equal amount of cashew butter for the peanut.  I am impatient and was baking with an almost 4-year-old kid, so we skipped the dough chilling portion of the instructions.  I'd recommend you go ahead with it- the cookies will be pretty flat if you don't.

After scooping balls of dough, I flattened each one slightly with my fingers and let my kiddo push chocolate chips onto the top of them.

You could also substitute soy nut butter or almond butter. Delicious!


Betty Crocker Cookbook Peanut Butter Cookies

1/2 cup granulated sugar
1/2 cup packed brown sugar
1/2 cup peanut butter (or cashew butter)
1/2 cup butter (1 stick), softened
1 egg
1 tsp. vanilla extract
1 1/4 cups all-purpose flour
3/4 teaspoon baking soda
1/2 teaspoon baking powder
1/4 teaspoon salt

Mix sugars, peanut butter, butter, vanilla, and egg in large bowl. Stir in remaining ingredients. Cover and refrigerate about 2 hours or until firm.

Heat oven to 375ºF.

Shape dough into 1 1/4-inch balls. Place about 3 inches apart on ungreased cookie sheet. Flatten in crisscross pattern with fork dipped into sugar.

Bake 9 to 10 minutes or until light golden brown. Cool 5 minutes; remove from cookie sheet. Cool on wire rack.

Dough was portioned with a spring-handled ice cream scooper.


Sampling the dough for texture and consistency.

More quality checks.  She goes the extra mile to ensure that our cookies are the best!
The finished product.  Yummy!