Tuesday, September 28, 2010

Key Lime Icebox Pie

The recent grocery store find of $0.89/pound bags of organic key limes sent me scurrying to the recipe from Cook's Country for Key Lime Icebox Pie.  I'm a huge citrus fan and have wanted to try this recipe for a while now.

It's a simple, no-cook dessert, and despite being a *bit* too tart (which I could've fixed but didn't- don't ask me why because I don't have a good reason), we still enjoyed it after adding ridiculous dollops of homemade whipped cream.

My first task was to juice two pounds of key limes.  The original recipe calls for using regular (Persian) limes, which would've been easier, but apparently I'm a glutton for punishment.  Juicing 50 to 60 teeny tiny limes is a great way to find every single cut and hangnail on your hands! 

It's also time-consuming, but I just juiced a few here and there while I was doing other stuff in the kitchen, rather than all at once.  And thankfully, these little green gems were thin-skinned, which made for easier juicing.  Take note- it's also easier to juice citrus that has been brought to room temperature rather than cold fruit.

So tiny and cute!
Strained juice, lime carcasses, and whole limes being stripped of their zest.
The chilled pie, complete with homemade graham cracker crust.
Plain slice - a bit too tart for our tastes but still pretty!
Now *that's* more like it!  :D

Browned Butter Chocolate Chip Cookies

Every little kid likes cookies, and my kid is no exception.  I recently decided to make a batch during daylight hours (daytime baking is a rare treat for me- most of it is done well after dark).  So I got my mini helper in the kitchen with me for some tasty treats.

My go-to recipe for chocolate chip cookies comes from the ever-trusty Alton Brown, of the Food Network show Good Eats.  Alton is my culinary crush (nerdy, cute, a killer cook- what's not to love?) and his recipes are at the top of my list when I'm looking for something new to try.

Alton's recipe uses melted butter instead of softened.  An article in my local paper got me thinking.  The article described a chocolate chip cookie made with browned butter- a simple but significant tweak in the flavor of that baking standby, by which the butter is melted in a saucepan and gently cooked until the butter solids turn golden brown.  This imparts a nutty, toasted flavor to the butter that is a great complement to many baked goods.

Since Alton's recipe has more brown sugar than white, I figured that the browned butter would go nicely to further the caramel-y flavor of the cookies.  I was right!

I didn't make any alterations to Alton's recipe, with the exception of browning the butter.  Make sure you are patient with the dough chilling portion.  I'm always scooping the dough while it's still soft, and my cookies are always too flat.  But they manage to wind up in my tummy anyway!  :)


First, get yourself an assistant-slash-taster.
Melt the butter gently in a saucepan.

It will foam quite a bit.  You can sorta see the solids browning.

Nope, that's not beer.  It's butter, baby!

Cute assistant sold separately.

Ghirardelli bittersweet chips are *the best tasting* chocolate chips for baking.  America's Test Kitchen told me so, and they were right!

Gotta make this kid earn her keep somehow.  Lookit those guns!

A one-ounce ice cream scoop works well for measuring out the dough.  It's also useful for meatballs.

Lumps of happy goodness waiting for the oven.

If you aren't impatient like me, your cookies won't be so flat.  Let the dough chill completely before scooping.

Flat or not, they taste frickin' awesome!

Sunday, September 5, 2010

Campfire Cookin' - Pork Chile Verde

This past June, I had the distinct pleasure of taking a road trip with my brother, sister, and brother-in-law to a family reunion in Montana.  On the way there, we camped out in Yellowstone National Park.  Hooray for that!  It was my first ever time camping and I had a great time, although I froze my ass off that night, had to get up to pee at o'dark thirty (sans contact lenses, in an unheated bathroom that thankfully had a flush toilet but no hot water), and I'm pretty sure I was sleeping head-down on an incline.  >.<

That being said...when we began to plan our camping portions of the trip, I decided that it would be a blog-tacular culinary adventure to cook over a campfire.  I offered to make the food for our dinner in Yellowstone, and I had the perfect adaptable recipe from the March 2010 issue of Bon Appetit magazine- Pork and Poblano Tamale PieI blogged this recipe previously as part of my Operation: Expand Horizons.

I made some changes to the recipe to make it a little simpler for campfire preparation, brought along my trusty Lodge cast iron Dutch oven and some nonperishable supplies, and bought the rest of the stuff in Cody, Wyoming, a charming little burg you'll want to visit some day.

The adaptations I made to the recipe were mostly to make the dish cheaper and easier to cook out of a cooler.  Instead of the scratch cornbread topping, I used a box of trusty Jiffy brand corn muffin mix and left out the cheese.  I omitted the freshly ground spices and opted for the simpler taste of the roasted peppers.  I didn't spring for any cilantro, and I used canned corn instead of frozen. 

It was simple and rustic and tasted freaking delicious, although my own tastes and the compliments I received may have been tinged somewhat with a healthy amount of road weariness and an overdose of convenience store snacks.  Either way, mission accomplished!

Supplies

Blurry picture- pretty sure it's my fault.

Dutch oven on the campfire

Sauteing the pork cubes in olive oil
Adding salsa verde, onions, garlic, water, and chicken bouillon cubes
Lazy girl's chile-roasting setup for 2 poblanos and 1 bell pepper
Peeling roasted peppers
Dicing roasted peppers
Adding corn and roasted peppers...looking good!
Cornbread topping.  If this was oven-baked, or perhaps buried in coals, the cornbread would brown.  Since we used the Dutch oven's lid and bottom heat, it steam-cooked and was light and fluffy.
We pretty much ate the whole pot.
I ate lots of roasted marshmallows for dessert!

Cooking 101: Lesson One - Prep work is everything!

If you're new to cooking, there are a few things you should practice along with the actual food.  Preparation is the key to successful food making.  It's especially helpful in lowering your stress levels while learning a blood pressure-raising task such as cooking.

The French, while snotty and lacking in personal grooming, have their shit locked down in the kitchen.  There is a French term, "mise en place," which is used in the restaurant industry.  It means "putting in place" and refers to the chef's setup.

When I get ready to cook dinner, there are several steps I go through before I ever turn on a stove burner or the oven.  They help me maintain an organized workspace, an organized brain, and a cleaner kitchen.

Begin with clean countertops and an empty sink.  You'll be glad you did.

1. Look at your recipe.  Give it a good read and determine the time needed for the steps.  Is it a crockpot-dump-and-forget-it, or is there ongoing work?  Do you have all of the ingredients?

2. Sharpen the knife or knives you'll be using.  I use a sharpening stone with two wheels- one rough and one smooth.  Wipe the knife with a clean towel to remove sharpening debris.

3. Get out the pans you'll need and set them on the stove.  Also retrieve any utensils you will be using- wooden spoon, rubber spatula, garlic press, measuring cups and spoons, etc.

4. If the kitchen trashcan is not near your work area, move it next to where you'll be standing.  If you use a compost bucket, have it nearby as well, ready for veggie scraps.

5. WASH YOUR HANDS with soap and warm water.  Dry them on a clean kitchen towel and keep that towel handy.

6. Get out all the ingredients you will need- spices, meat, veggies, eggs, olive oil, etc. and set them in your work area.

7. Measure out spices and put them in small bowls.  I have 4 tiny glass bowls I got at a restaurant supply store.  Each only holds about 2 Tbsp. but they are perfect for minced garlic, spices, and small amounts of garnish like chives or parsley.  Also measure out any liquids you'll be using, such as chicken stock, water, or milk.

8. Starting with vegetables, do all of the necessary chopping.  Set veggies aside in small bowls.  You can combine the ones that will be cooked together to save space.  After all of the veggies are prepped, cut your meat, if using.

9. Put the meaty cutting board and knife in the sink, wash your hands again, and wipe down the countertop.

10. Now...cook!

Vegetables prepped for a Japanese style hibachi stir-fry
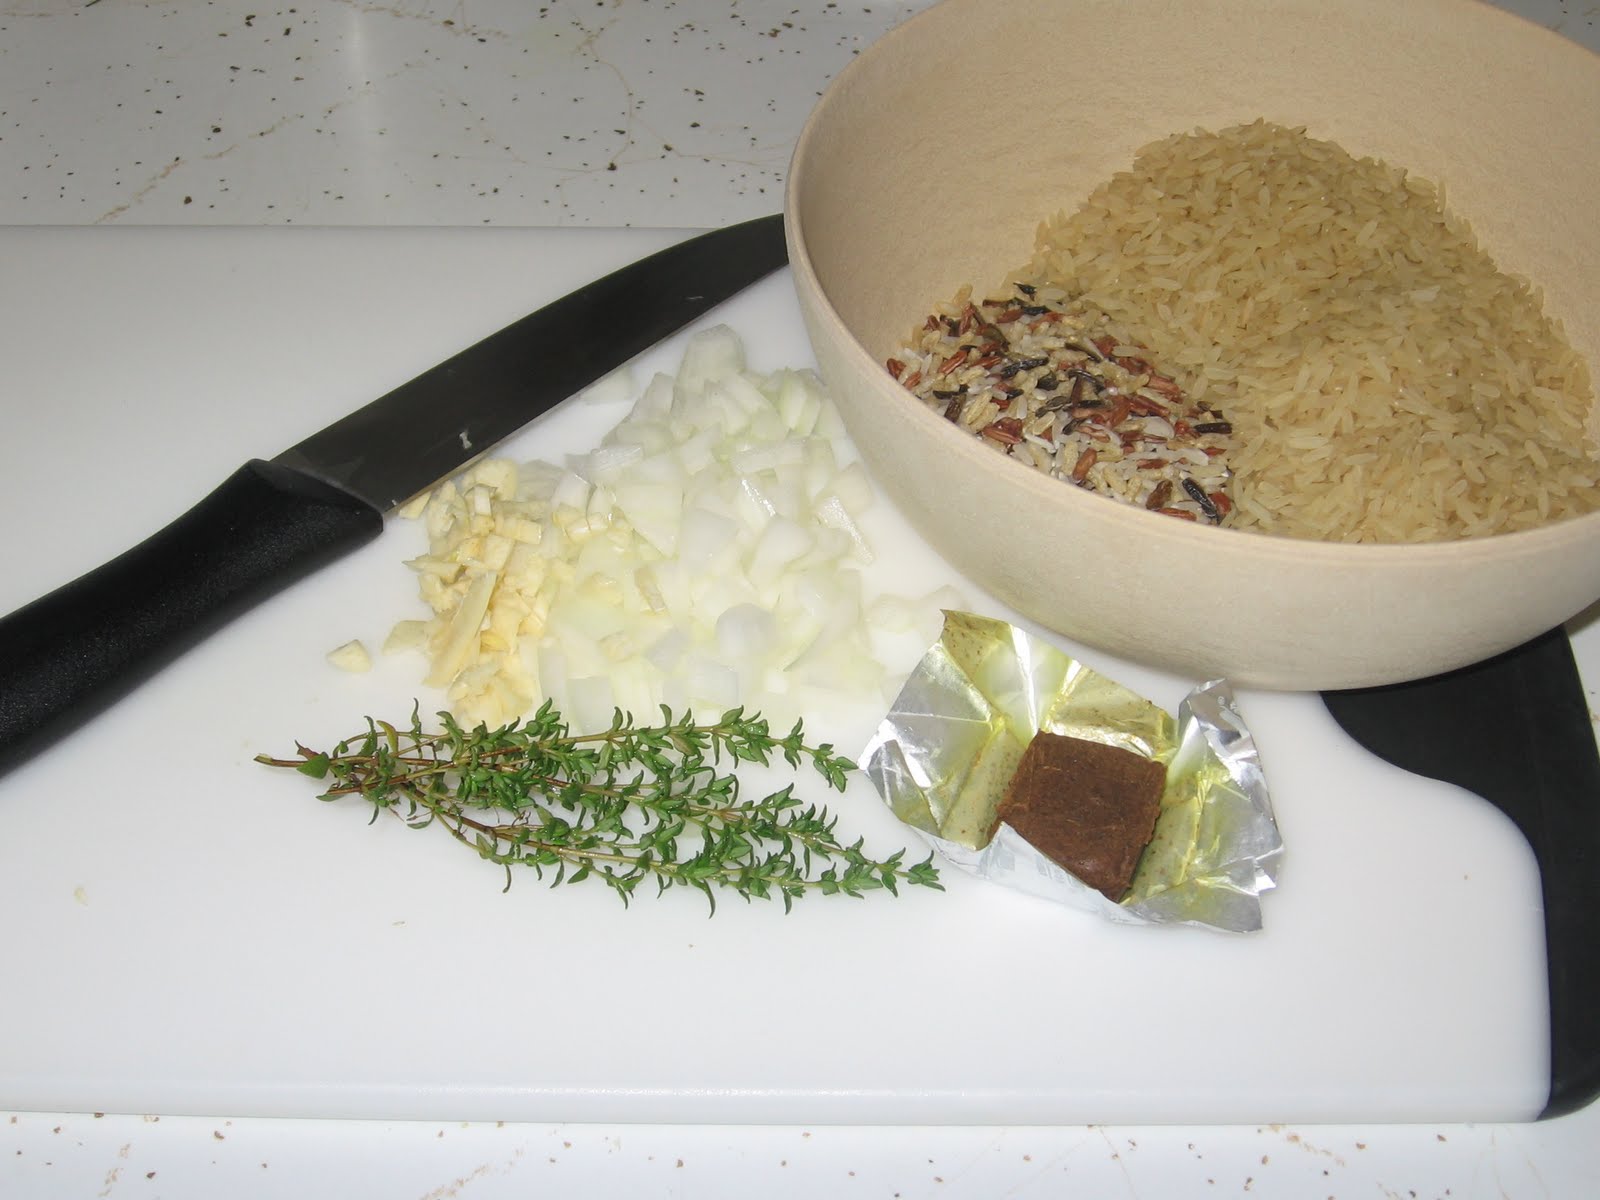
Mise en place for rice pilaf- minced garlic, chopped onion, vegetable bouillon cube, thyme sprigs, white and wild rices in measured amounts
Mise en place for spring vegetable couscous.  Here are my tiny prep bowls- so cute and so functional!