Wednesday, August 25, 2010

The Errant Kitchen

I've read my fair share of food blogs, and I always wonder what those cooks are working with in their kitchens.  Do they have a sprawling country kitchen or are they bumping their elbows in a NYC style postage stamp?

Wonder no more about my humble kitchen, kiddies.  Here she is in all her mid-century modern glory.

Galley-style 1950s kitchen

If it hits the ground, it goes to the hound.  This is Barney, the eldest of our 3 dogs.  That is Barney's Laying Spot.

Limited counter space, so I've got to keep it clean and cleared off.

Fridge cluttered with recently used recipes, magnets, some artwork from my kid, and a few notes.

My kitchen gadget wish list on the left, and this week's menu on the right.

My favorite magnet.

More cool magnets- we found the gears a few years ago at Pottery Barn Kids and I got the Dr. Seuss ones in the dollar bin at Target.

Wall O' Workhorses- KitchenAid food processor, vintage chrome and glass Osterizer blender, compost scraps container, cool toaster I got for Christmas, and awesome thermal carafe Cuisinart coffee pot, also an Xmas gift.

Designated greenery.  I have to keep the tendrils tucked in because they tickle me in the face while I do dishes if they get a little long.

My much loathed glass-top stove with one bad burner (came with the house), bread dough rising, good knives from Victorinox, Wüsthof, and Henckels, vintage canisters, organic bananas, and my KitchenAid stand mixer under its dust cover.

Tuesday, August 24, 2010

Freezing beans


I'm on a multi-sided mission lately: trim out even more processed food, reduce waste, and reduce my grocery budget.  We already eat a pretty good diet that very rarely includes anything processed, so it's not hard to find substitution methods for those things we do buy in a package. 

We love beans of all kinds, and I recently decided to start cooking them from scratch more often.  However, dried beans take some forethought, and I don't always have things planned like I should, so I thought I'd try the freezer for another option.

As for the budgetary concerns, while canned beans aren't what you might consider expensive, it can get pricey if you eat them frequently enough.  One 15-ounce can is about $1.25 to $1.50.  They are about 3 times more expensive than dried beans, can be loaded with salt if you're not careful, and they add to the trash by being packaged in steel cans.  (Sadly, steel recycling in my city is not readily available.)  Plus, since canned beans weigh more than dried, it's more costly to ship them.

Dried beans to the rescue!  Using some tips I read online, I decided to freeze some portions of cooked dried beans.  Here's what I did.

This time around, I chose to make some pintos and some black turtle beans. I started with the requisite pre-soak.  I dumped each 1 pound bag of beans into a big bowl, covered them with about 2" of water, and left them on the counter for about 15 hours.  Normally the instructions say to soak for 6-8 hours, but I found that a much longer soak meant fewer burst beans and a shorter cooking time.

After that, I drained off the soaking water, gave the beans a rinse, and put each batch into a stockpot with a fresh 2" cover of water.  I brought each pan to a low boil, reduced the heat slightly, and simmered them for about 35 minutes until they were just barely done.  (A website suggested that a little underdoneness can help frozen beans retain better texture.)

Each pot was drained of its cooking liquid before being measured out into freezer bags.  Each pound of dried beans netted 2 pounds 6 ounces of cooked beans, which I divided into 3 portions.  I then made a brine of a cup of hot water and 2 teaspoons of kosher salt and added about a 1/3 of a cup to each bag, bringing each bag's weight to about 15 ounces, the size of a can of beans.

After being labeled, the bags were left to cool on the counter for a bit before hitting the freezer.


I kept out one of the 15-ounce portions of black beans so that I can make black bean soup tomorrow!  :)

Hummus and Veggie Wrap


In an attempt to atone for last night's dinner of Philly cheese steaks with fried potatoes, I decided to make a super healthy lunch of hummus and veggie wraps.  Thankfully, it was also kid-friendly, which for my über-carnivore child is a big deal.

Hummus is widely available in grocery stores, but homemade is so much better.  You can better control the content of the salt, for one, and you can also customize it to your tastes.  Some places add too much tahini (sesame seed paste) for my liking, which can add unwanted bitterness.  Others make theirs the consistency of baby food- I like mine free of chunks, but I don't mind a little texture.

I blogged about the simple joys of hummus once before, and you can find my recipe here.


I made myself a wrap with a generous schmear of hummus on a small tortilla and piled it high with an assortment of vegetables- cucumber, tomato, carrot, and alfalfa sprouts.  I sprinkled a little kosher salt on the tomato slices before closing it up. 

My kiddo had a dollop of hummus on her plate with some carrot and cucumber slices and wedges of tortilla for dipping.  She also used her finger to get up the last few bits!  :D

Wednesday, August 18, 2010

Oatmeal Sandwich Bread


Oklahoma summer has been especially cruel to this lover of all things that come from the oven.  With our 1-year-old AC even struggling to stay below 78 on these 100-plus days, baking of any kind has been strictly forbidden by my heat-intolerant husband.  In fact, he's broken his takeout-only streak and actually taken *me* out to eat in order to avoid my turning on the stove for dinner.

So when we got some torrential rain and accompanying cool front yesterday, after I got done dancing a gleeful jig, I celebrated by baking a loaf of bread.  The recipe was one I had not yet tried and was made available by fellow Okie and famous-ish blogger and writer Molly Wizenberg of Orangette

I'm not a regular of Molly's blog for no reason other than my own apparent inability to remember to visit it (call it mommy brain), but you should definitely check it out.  She also writes monthly for Bon Appetit magazine.

This bread turned out to be everything it was promised- simply delicious.  I will make it again.  And again.  It's easy, the dough rose like the dickens, and the texture is divine. 

I made one small substitution to the recipe - available here in case you missed it - I used maple syrup instead of molasses, for the simple fact that I didn't own any molasses but I did have the syrup wasting away in the fridge.

Chicken Chili


While fall has not *officially* arrived, I'm still already craving autumnal dishes.  We eat a lot of chili when it's cold outside, and I've managed to create a pretty damn good chicken version. 

I started off a few years ago with a recipe from my uncle Frank, a kickass cook in his own right.  I tweaked the ingredients to better suit our tastes- less heat, black beans instead of great northern- and voila!  An easy one-pot dinner that garners me lovely compliments from anyone who eats it.  Even a confirmed novice can make this one, and it's very kid friendly and full of veggies and fiber.

Chicken Chili
Serves 4-6

4 boneless, skinless chicken breasts, cubed
1 cup chopped onion
2 stalks celery, chopped
3-4 cloves garlic, chopped or put through a press
1 - 15 oz. can black beans, drained (I don't rinse mine)
1 - 15 oz. can corn, drained
1 can Ro-Tel tomatoes with green chiles, mild or regular, *not* drained
2 tsp. chile powder (I buy chile New Mexico powder from the Latin section of the grocery store- it's inexpensive, mild, and has a nicer, purer flavor than the mixture called "chili powder")
1 tbsp. ground cumin
1 tsp. dried oregano
1 tbsp. Worcestershire sauce
3 chicken bouillon cubes
2-3 cups water (or omit cubes and just use 2-3 cups of chicken stock)
Olive oil
Kosher salt and fresh black pepper
Garnishes as desired: chopped fresh cilantro, sour cream or yogurt, green onions, chipotle Tabasco sauce (a mild and smoky hot sauce)

Heat a good drizzle of olive oil in a large stockpot over medium-high heat.  Add the cubed chicken, season with a little salt and pepper, and cook, stirring frequently, until chicken is almost cooked through, 5-8 minutes.  Add onion, celery, and garlic and cook for another 2-3 minutes.  Stir in chile powder, cumin, oregano, and Worcestershire.  Add the bouillon cubes, water, beans, corn, and Ro-Tel (with its liquid).  Bring to a simmer and cook, uncovered, for about 15 minutes.

Garnish with cilantro, sour cream, or other things as desired.  My husband likes his a little smoky, so he uses the chipotle Tabasco. 

It's especially good as leftovers.

Peach Butter


Part of my recent adventure into the world of canning has already included the putting up of some beautiful local peaches.  There's a small town called Porter near Tulsa, where I live, and Porter is famous for its delicious summery, fuzzy fruit.

I purchased a few more pounds recently, intending to put up more jars of peach halves.  However, I procrastinated and several of the peaches wound up a little too soft and bruised for that.  Never fear!  Fruit butter to the rescue.

I looked to a blog called Food In Jars for help.  Their site has some general instructions, but no specific recipe, so if you're also a canning n00b, do as I did and venture forth at your own peril.

It all starts with fresh peaches, relieved of their skins by a brief dip into boiling water.  This is best accomplished by making a small X in each peach's bum with a sharp paring knife, dunking a few of them at a time into a roiling stockpot, and removing them carefully with a wire spider or slotted spoon.  When they've cooled enough to handle, gently slip the skins off and discard them.  Better yet, throw them in the compost bin!

Nekkid peaches!  :O

Next the fruit is cubed.  There's no need for anything close to perfection.  You'll be cooking the bejeesus out of these babies, so whack away.


A small amount of water is added and the pot is brought to a boil.


After a thorough boiling, the whole mess is moved to a crock pot for slow cooking, which will reduce and thicken the peaches without the hassle of monitoring the stovetop.  Prop open the lid with a wooden spoon to allow the steam to escape.  My crock pot is old, so I turned it to high.  Most newer ones will work on low.

I cooked mine for a good part of the day, but I'm bad about timing so I can't tell you how long it took to wind up like this.  You'll just have to judge for yourself!


One more reason why I need an immersion blender.  This stuff is super hot and I was very careful when transferring it in and out of my regular blender to puree it.


After pureeing, I added sugar, cinnamon, ground ginger, and some lemon juice to my taste, filled my jars, and processed them.  Since my batch was smaller than the one on Food In Jars, I had to wing it.

Purty orangey-brown goodness for my toasty and waffle-y enjoyment!

Wednesday, August 11, 2010

Pecan Waffle with Peach Puree


We love eating a big breakfast on the weekend, and last Saturday night, while thinking about the next morning's fare of waffles and bacon, I was struck with an inspiration. Peaches. And pecans. And a waffle. Delicious inspiration, to say the least.

Alton Brown of the Food Network has a great scratch waffle recipe that I use all the time. Trust me- you won't want boxed mix waffles again after you try it. (He also has a really good pancake recipe.)

I made my husband his plain waffle and then started on mine. I ladled batter into the waffle iron like usual, only this time, I sprinkled the top of the batter with a healthy dose of chopped pecans before closing the lid.


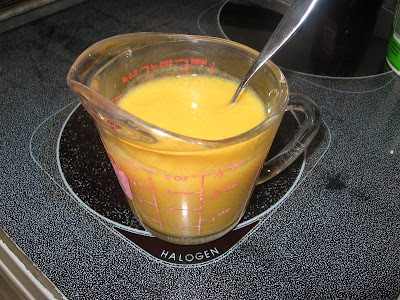
Instead of regular pancake syrup, I made some peach puree out of some peaches I canned myself last month. I threw the chunks and some of the juice into the blender with a healthy pinch of brown sugar and a sprinkling of cinnamon and blended it smooth.


The resulting photo does look a little like a waffle covered in nacho cheese, but trust me, it was amazing. The peach puree was just right, a welcome fruity change from the overly sweet syrup I normally use. I will definitely be making my waffles like this again!

The Well-Appointed Pantry


A sampling of what's in my pantry...

Back row, from left: dry pinto beans, ground flax seed, instant potato flakes (for making bread only!), lentils, rigatoni, slivered almonds, bulgur wheat (for tabouli), egg noodles and rice stick noodles, and Bob's Red Mill 7-Grain hot cereal.

Front row, from left: green split peas, black turtle beans, great northern beans, red beans.

I've been doing some organizing and deep-cleaning in my kitchen lately. I did an inventory, got rid of a couple of things, and cleaned each shelf in the pantry. A bottle of red wine vinegar was out of date and looking nasty, so I poured it out and threw the rinsed bottle in the recycling. (Remember the 3 Rs...reduce, reuse, recycle!)

While I was doing this mini-project, I decided a blog post was in order on a well-stocked pantry. Dry goods are an essential part of cooking, as they can be a big money saver.
Some of my favorite dry goods are rice, wild rice blend, black beans, red beans, pinto beans, lentils, split peas, canned fruit, Craisins, and old fashioned oats. Try some in your next kitchen adventure. Your wallet and your belly will thank you!

Chicken Saltimbocca with roasted red potatoes and cucumber-tomato salad


Oh yeah. This is what I'm talkin' about...an easy-peasy dinner that looks awesome but is super simple to make and tastes delicious.

I had never tried Chicken Saltimbocca before seeing it featured on an episode of America's Test Kitchen. I snagged the recipe and have made it twice now. It's perfect for impressing company while not spending all night in the kitchen.

"Saltimbocca" apparently means "jumps in the mouth" in Italian, which is what the flavors of this dish are supposed to do. It's a simple combination of sage and prosciutto that I really like.


Chicken Saltimbocca
serves 4

2 large boneless, skinless chicken breasts, halved horizontally into cutlets
1/4 cup all-purpose flour, seasoned generously with fresh black pepper
1/4 cup fresh sage leaves, chopped
4 thin slices prosciutto (not shaved, just thinly sliced)
Kosher salt
Extra-virgin olive oil

Pat the chicken dry with paper towels and sprinkle on just a bit of kosher salt. Dredge the chicken in the peppered flour and shake off the excess. Lay the cutlets flat, divide the chopped sage between them (one side only), and press gently to adhere. Press a slice of prosciutto on top of each cutlet, over the sage.

Heat about 2 tbsp. of olive oil in a large nonstick skillet over medium heat. Place each cutlet in the pan gently, prosciutto-side down, and cook for about 3 minutes. Flip and cook through. Serve. (I wound up flipping a second time to get the cutlets cooked thoroughly and nicely browned.)


I served the chicken with some roasted red potatoes and an easy salad of summer's favorite veggies. I drizzled sliced tomatoes and cucumbers with olive oil and balsamic vinegar, sprinkled salt and pepper over them, and crumbled some feta cheese on top. So good!


The roasted red potatoes were super simple, too. I just scrubbed some small ones, cubed them (skins on, of course!), and tossed them in a roasting pan with a sliced shallot, olive oil, and garlic salt and pepper. I roasted them in my oven on the convection setting at 400º for about 20 minutes, give or take, until they were fragrant and starting to brown.

Delish!

Friday, August 6, 2010

Baked Potato Soup


Baked potato soup has to be, hands down, one of my favorite spoon-eaten meals. It's also my kiddo's most recent favorite lunch. We go to Panera Bread every week and she always wants a bowl. I decided to make some for lunch at home.

Being that it is the middle of summer here in Oklahoma, and the average daily temperature is hovering around 285º Fahrenheit, I'm loathe to use my oven right now. Crock pot to the rescue! I've used my slow cooker once before to make baked potatoes in this heat, and while the result wasn't my husband's favorite for a side item with steak, it is perfectly fine for other applications.

I started off with about one and a half pounds of Yukon Gold potatoes (about 7 medium). If you've not yet tried Yukons, get on it! Their flavor and texture is far superior to the more common Russet. Their skins are thin and perfect for skin-on eating. There's an abundance of good-for-you fiber and nutrients in them thar skins, so leave your peeler in the drawer.

I put the crock pot on low, made a large pouch out of foil, and put the whole taters in it. Before closing the pouch, I poked each potato with a knife, spritzed on some Pam, and sprinkled them liberally with kosher salt. After cooking them overnight, I turned off the crock pot and took my kid to the library for story time.

By the time we came home, the whole potatoes had cooled enough to handle. I cubed them and set them aside while I started on the soup base.


Mmmmm...bacon. I diced up 4 strips of bacon and cooked them in a stock pot. After the bacon is crispy, remove it to a small bowl and pour off all but about a tablespoon of the grease.


Saute some chopped onion (about 1/2 cup), celery (1 stalk), and garlic (2 medium cloves) in the remaining bacon fat until just starting to soften. Sprinkle on 1 tablespoon of flour and stir.


Add 1 cup chicken broth and 3 cups milk, scraping the bottom of the pan with the spoon to get up all that delicious brown stuff, called "fond" by the French. It's pure flavor.

Add the cubed potatoes to the pot and simmer for about ten minutes, or until the celery and onion are tender. Mash the potatoes slightly. Don't obliterate them- you want some good chunks in there.


To make this soup really thick and good, I pureed about 4 ladles-full in the blender. Be careful with this step. Make sure you hold the lid on or you could splatter yourself with very hot soup.


Return the pureed portion to the pot, stir well, and season to taste with salt and pepper. I threw in a palm full of chopped chives from my garden. You could also use thinly sliced green onions. It really gives a good flavor boost. Yum!