Friday, July 30, 2010

Strawberry Lemon Marmalade


The gals over at the blog Doris And Jilly Cook have a recipe for Strawberry Lemon Marmalade that a friend of mine recently made and raved about, so I thought I'd give it a shot.

I've only begun canning and preserving in the past month or so, and had never before made jam or jelly. I love strawberries and lemons, and this time of year is perfect for tasty and inexpensive berries from my local grocery store, so I thought I'd have a go.


Sterilized half-pint jars. The recipe said it makes 4-5 half pints; I wound up with six. Thankfully I prepared an extra when I saw the quantity of marmalade that was cooking.


The gorgeous fresh strawberries I used. The original recipe is for frozen sugared berries; since they're in season, I used fresh, chopped them up, and sweetened them. I used about a quart and a half of whole berries to wind up with 4 cups of chopped. It may have contributed to the excess that I wound up with. It's impossible to know, when someone says to use a quart of berries, if their berries were smaller than mine, or if they were whole or chopped up.


Thinly sliced and chopped lemons are brought to a boil in water and left in their cooking liquid overnight. Next time, I'll use my mandoline slicer to get paper-thin slices.


Chopped sweetened berries and more sugar are added to the lemons and the whole mess is cooked until syrupy. See Doris and Jilly's blog for tips on getting the right consistency for gelling if you've never made jam before.


A couple of lessons were learned from this, my first jam-making experience.

One: Boiling marmalade/jam/preserves is the culinary equivalent of freshly spewed lava from Mt. Kilauea. Cook on a back burner so as to avoid splattering yourself with this sticky stuff that's about as hot as the sun. Thankfully, I thought about this beforehand and wasn't injured. Cleanup is also markedly easier if you wipe splatters and spills immediately with a warm wet towel. After it dries, good luck. Grease up those elbows.

Two: The recipe calls for 4 medium lemons. Three of mine were more on the large side, which I think accounted for part of having six half pints instead of 4 or 5. It also made the marmalade a little more tart than I might have preferred.

Three: This was a lot easier than I thought it would be, very rewarding, and definitely worth another batch eventually.

Hibachi-Style Steak and Veggies with Ginger Sauce


Some spare vegetables and an extra ribeye gave me divinely delicious inspiration recently: Benihana-style faux-hibachi dinner. I've done this before and it is easy and tasty, not to mention LOADS cheaper than a night out at your local Japanese steakhouse. All you need are quality ingredients, an electric griddle (it's not just for pancakes), and a good dipping sauce recipe. Here we go!

First, the sauce. We've tried innumerable store-bought Asian-style sauces with no luck. They were all too something: too salty, too sweet, too fishy, too bland. I've never been to an actual Benihana restaurant, but we have a local version here called Shogun that has similar food, from what I'm told. Shogun's ginger dipping sauce is fantastic, and I thought maybe Benihana's would be too.

I found a recipe purporting to be the one used at Benihana, tried it, and modified it to be even better. This sauce is perfect with steak, chicken, and vegetables. You'll have more than you need for this meal, so stick the rest in a zip-top bag and freeze it for later!

Ginger Soy Dipping Sauce
makes about a cup and a half

1/4 of a medium yellow onion, chopped
1 tbsp. peeled and grated fresh ginger
2 tbsp. fresh lemon juice
1/4 cup rice vinegar
1/2 cup soy sauce (I like the Kikkoman low sodium version.)
3/4 cup brown sugar
1 tbsp. Asian garlic chili sauce (I like the Roland brand.)

Whir it up in a blender until combined. Set aside until ready to serve.


This is my griddle, a very old but dependable Presto that I received secondhand many moons ago. The knob goes up to 400º (presumably that's close to actual heating temperature), so that's what I set it to. I greased it lightly with vegetable oil.


Mung bean sprouts are a key part of the vegetable portion of this meal. They are cheap - about 99 cents a bag - and provide a welcome crunch.


I used traditional hibachi steakhouse veggies- onions, zucchini, and mushrooms. Don't cut them too small. You want some substance even after they are cooked.


I had one ribeye left out of a bulk package from Sam's Club. I seasoned it with kosher salt and fresh black pepper before letting it rest and warm up a little. Cold meat doesn't cook as well.


I started the steak first, getting a good brown seared crust on one side before flipping it over and covering it with a saucepan lid to help hold in heat. I wound up flipping it a couple of times to cook it thoroughly- we like our steak medium to medium-well.


While the steak is cooking on one side of the griddle, start cooking the onions, zucchini, and mushrooms on the other. Mix them together, season with kosher salt and pepper, and stir occasionally with a spatula. You don't want to have too much liquid around them, or they'll get soggy instead of browned. A squeeze of lemon juice as they finish cooking is quite nice.


When the vegetables are almost done, stir-fry the mung beans by themselves for a minute or two before mixing them in with the other veggies.

Serve a hunk of steak, a pile of veggies and sprouts, and plain cooked rice with a small dish of ginger sauce for dipping and drizzling.

Now that's umami.

Greek Yogurt

A sweet lady named Paula (codename: Romaine) has a blog called "Salad In A Jar," and she has a popular post detailing how to make Greek yogurt at home. I followed her instructions and have been making my own yogurt for the past couple of months. It's super easy and waaaaaay cheaper than buying yogurt. In fact, the batch I just made the other day was created with a half-gallon of milk I purchased for only $0.99. I got about a quart of yogurt for a buck!

Paula uses skim milk to make her yogurt, but since we drink 2%, that's what I use.

After scalding the milk, cooling it slightly, and adding the starter, I cover the bowl in plastic wrap and set it on a heating pad turned to "low" for about 11 hours. I check the temperature periodically with my Fluke infrared thermometer to make sure it hovers around the 100º mark. If it gets a little warm, I just pull back the towel and plastic wrap for a bit.


Overnight is about right, and by morning the yogurt is ready for straining. I gently pour off whatever whey I can, and then briefly strain scoops of yogurt in a very fine mesh strainer. The yogurt pictured here looks lumpy for some reason, but it's not.


My new interest in canning has provided me with some spare glass Mason jars, so that's how I store my yogurt since glass keeps odors out.


See the post below for a tasty way to eat this kind of yogurt. You can also use it in recipes, in place of sour cream, or in a fruit smoothie.

Honey-Walnut Granola


For some reason, certain types of food are quite pricey at the store, despite the fact that they are cheap to make at home. Granola is one of them. Plus, store-bought granola always has something I don't like- either too much sugar, too much fat, or some kind of dried fruit I'm not a fan of. This version is simple, good for you, and SO easy to make.

These measurements are approximate, since I threw this together on a whim.

Honey-Walnut Granola

Preheat the oven to 350º. On a rimmed baking sheet, toss together 2 cups of oats (I used old fashioned- quick oats would probably be OK too), half a cup of sliced almonds (you can use more- that's what I had sitting in the pantry), and about a cup and a quarter of walnut pieces (I bought a 6 ounce bag and broke up larger chunks with my fingers).

Mix together about 1/4 cup of vegetable oil and about 1/2 cup of honey. This will take a bit of stirring. A fork works better than a spoon. Drizzle the glaze over the oat/nut mixture and toss well with a rubber spatula to coat. Give the whole mess a generous sprinkling of cinnamon, and about a pinch of salt. Toss well.

Bake in the preheated 350º oven for about 15-20 minutes until golden brown and fragrant, tossing with a spatula about halfway through. Stir again a few times as the granola cools, which will help keep it from sticking to the baking sheet. Store at room temperature in a sealed container.


As you can see from the top photo, I like my granola in parfait form. I layered some homemade Greek yogurt (a future post), a sprinkling of brown sugar, some fresh blueberries, and a generous amount of granola. It's delicious for breakfast OR dessert!

Wednesday, July 21, 2010

Bundt Pan Roast Chicken


Roast chicken is easily one of my favorite meals, and it's so easy. I read about using a Bundt pan to roast chicken on a blog recently and I thought I'd give it a shot.

First, you should know that meat and chicken cook more evenly and brown better if you don't try to roast or grill them cold. My chicken was pretty cold, so I put it in a sinkful of hot water first, still in its package.


After the chicken was room temperature, I removed the gizzard, liver, and neck and discarded them. (You can reserve them for chicken stock, if desired, and the gizzard and liver make excellent dog treats once cooked.)

Preheat the oven to 400º and lower the rack to the bottom third of the oven.

I prepared some vegetables for the bottom of the Bundt pan- small Yukon Gold potatoes, carrot chunks, and wedges of red onion. I seasoned them with salt and pepper and tossed in 4 sprigs of thyme from my garden.

This Bundt pan originally belonged to my Great-Grandmother Castle, a helluva lady and a great cook. She made fantastic rum cake in this pan every holiday season, and I hope I do her memory justice. I like to think this pan has good kitchen karma.


Place the Bundt pan on a sheet pan- not a cookie sheet, but one with sides, just in case some juice escapes. Plop the chicken ass-down over the center of the Bundt. Brush it with melted butter and sprinkle generously with salt and pepper. Stuff the neck cavity with an onion half and some more thyme sprigs.

Roast the bird and veggies in the preheated 400º oven for about an hour, until the skin is golden brown and an instant-read thermometer registers 160º. Serve the carved chicken with the vegetables and drizzle everything with the pan juices.


Perfect!

Easy Chicken Caesar Wraps


These chicken Caesar wraps were my husband's idea for lunch one day, and I must say, I'm very happy with myself for the execution.

The foundation of the wrap was a mixture of lovely vegetables- Romaine lettuce, red onion (always the best choice for salads and sandwiches because of its sweetness), and home-grown yellow and red tomatoes.


Chicken cutlets were sprinkled with garlic salt and fresh pepper before being grilled until cooked through but still juicy, and then they were sliced thinly.


We had been on the hunt for a good quality creamy Caesar dressing for salads, and boy howdy, did we find one! Brianna's Home Style Asiago Caesar Dressing is the bomb. It's made in Texas, but I forgive them for that. ;) I chose it because it won a Chef's Best Award, which is a sign of a good product in the food world.


You could use pita or other flatbread for this wrap, but I chose to use my favorite tortillas, La Banderita. They're delicious and soft, and the soft taco size is perfect for this and other uses.


I piled the sliced chicken and veggies on each tortilla and gave them a generous drizzle of the Caesar dressing before rolling up. Super simple, healthy-ish, and so delicious!

Philly Sandwiches


OK, so I completely had brain farts during the photography section of this meal and missed out on several key shots, so you'll just have to imagine pics of the completed sandwich in all its beefy, cheesy glory.

Philly sandwiches are so often messed up in restaurants it's not even funny. I haven't had a "real" one since I've never been to PA, but I know from TV what goes into one and I know enough about food to take that stuff, cook it, and make a delicious Philly. So here goes.

The key to the Philly is the meat. You want a decent cut of steak that won't be tough when cooked quickly. I like to use flat iron steaks. They're inexpensive and taste really good.

Slice about a pound of cold flat iron steak into thin strips. Season the strips with garlic salt and fresh black pepper. Cover the meat with a paper towel and let it rest and warm up a little to room temperature.

Slice up some red onion and green bell pepper. I cut my onion into 1/4" half-circles and the bell pepper into 1/2" wide strips. I normally prefer red or orange bells, but for this sandwich, the tangy flavor of a green bell is better suited.

In the meantime, prepare the buns and preheat the oven to 350º. I like soft hoagie rolls with sesame seeds on top. Lay the bun halves out on a sheet pan, spread both halves with Cheez Whiz (my husband prefers sliced Swiss, but supposedly, good ole Whiz is more authentic, and I like it better), and place the pan in the oven to heat and soften the buns and melt the cheese.

Heat a little vegetable oil in a large skillet, preferably cast iron, on medium-high heat until the oil is shimmering. Add the steak strips to the skillet and cook, stirring frequently, for about 2 minutes. Add the onions and peppers. Keep the skillet contents moving and make sure the heat is adequately high- you want to sear this stuff, not boil it.

When the meat is cooked and the onions have started to caramelize, your sandwich guts are complete. Pile them onto your warm, cheese-coated hoagie roll and enjoy.

Slurp!

Friday, June 18, 2010

Pork Stew with Hard Cider, Pearl Onions, and Potatoes


The February 2010 issue of Bon Appétit offers a decidedly wintry concoction called Pork Stew with Hard Cider, Pearl Onions, and Potatoes. However, I loves me some stew any time of year, and given that my husband is a die hard meat-n-taters man, I figured this would be a good choice. It was, but I'd make some changes for next time.

We thought the finished product was a little too sweet, probably due to the inclusion of a chopped Granny Smith apple. I'll leave that out next time. I'll also leave out the thickener, a paste of butter and flour whisked into the finished stew. It wasn't necessary.

A delectable mix of root veggies was used. The purple onions came out of my vegetable garden. For some reason, they all came out really small, but since this recipe calls for pearl onions, they were the perfect size!


Chopped bacon is cooked and removed to be added back later. I love bacon!


Cubes of boneless pork shoulder, also called Boston butt, are seasoned with salt and pepper before being browned in the bacon fat.


The cider I used was a kind I drink regularly, Hornsby's Hard Cider Amber Draft. I'm not a beer drinker, but this stuff tastes deliciously apple-y. I halved the recipe, so part of the cider was for cooking and part of it was for drinking. My kinda dinnertime!


This was the first time I've ever cooked parsnips, which were sautéed with chopped shallots.


The photo of the finished stew keeps winding up funky on the post's layout, so I'll try to add it again later.


Pork Chops with Peppers and Green Beans


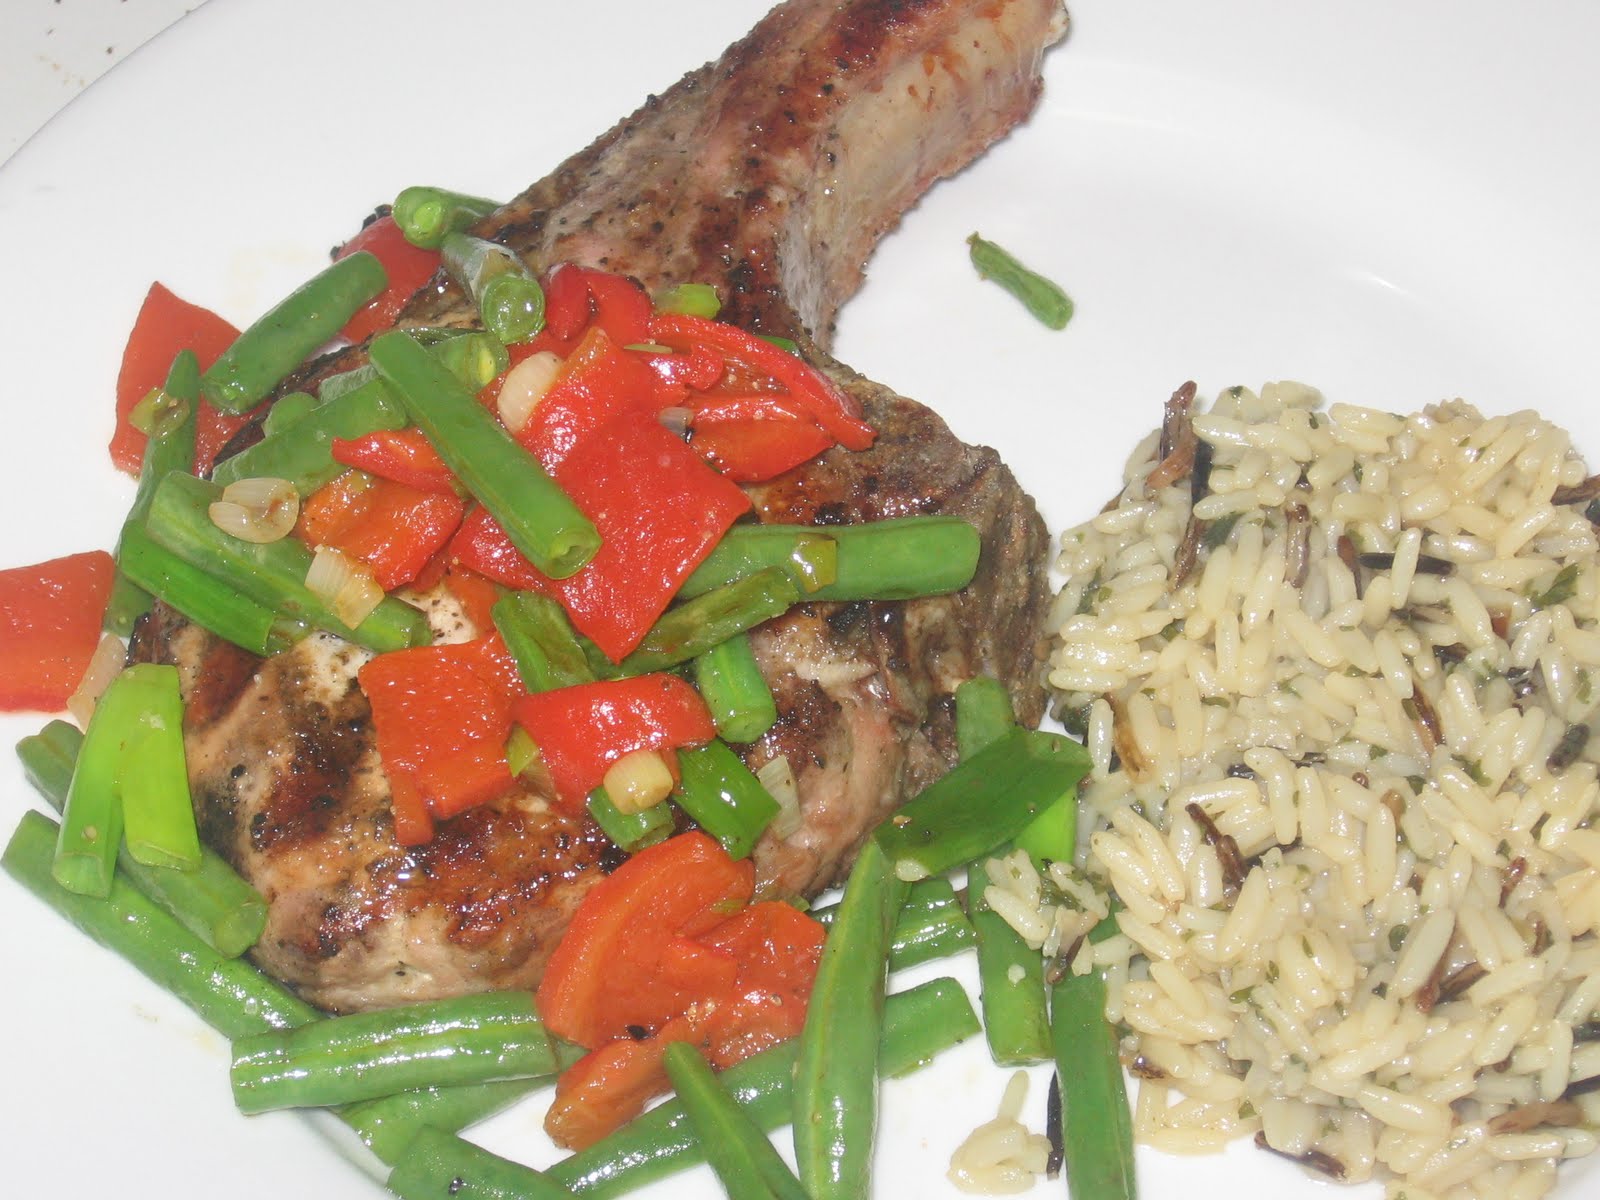
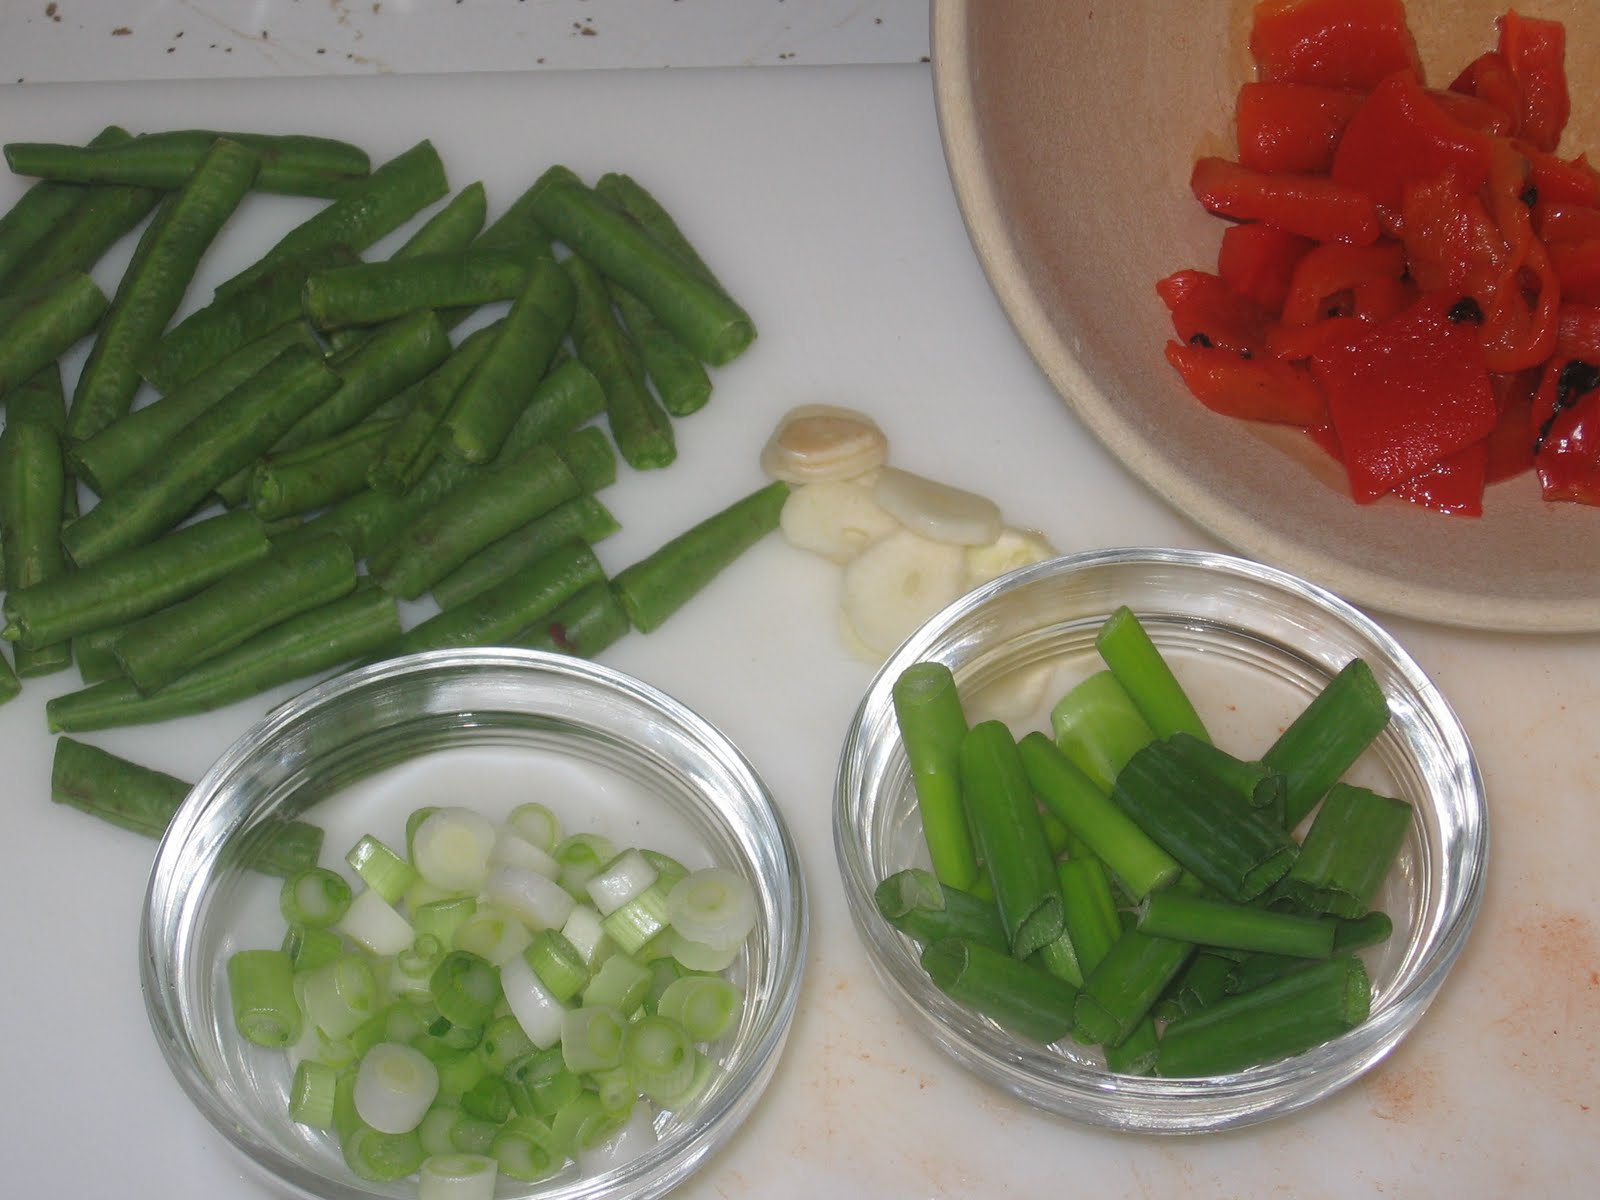
The May 2010 issue of Everyday Food offers a recipe for Pork Chops with Peppers and Green Beans that is simple and tasty. I'm always looking for ways to sneak more vegetables into our meals, and this is a good one. You simply grill bone-in pork chops with some salt and pepper, and make the veggies separately to pile on top of the cooked chops.

I substituted garlic for the ginger because I forgot to buy fresh ginger, and I left out the jalapeño because I was feeding a 3 year old. The green bean and roasted pepper combination was unexpectedly good. I love roasted peppers, and fresh green beans are welcome on my plate any time.


This was one of the dishes I knew my husband would complain about, so I served him a plain pork chop and made some Rice-A-Roni wild rice pilaf on the side, which he likes. I'd prefer to ditch boxed sides altogether, but we compromise with rice and I often make my own with onion, garlic, parsley, and chicken broth instead of the plethora of unpronounceable crap that goes into a box of rice mix.

Operation: Expand Horizons - The Moral of the Story

I'd have to say that Operation: Expand Horizons was a blessing and a curse. The blessing part was that I got to try some new recipes, cook some interesting dishes, and clean out the recipe collection a bit.

The curse part was that my picky-eater husband pretty much bitched the entire month. How dare I ruin a perfectly good pork chop by putting stuff on top of it, and why can't we just have rice or potatoes or green beans for every side dish?

There were some good things in the process, too. I realized that planning a menu ahead of time, even just week by week, helps reduce stress tremendously. The simple act of having a list on the fridge of what's on deck for that week makes things easier.

I realized that despite my husband's pickiness, I am a pretty good cook, and even though feeding him for the rest of my life will most assuredly be a pain in the ass at times, I do thoroughly enjoy cooking and baking and feeding my family good food. I'm damn stubborn and I can't shake the feeling that I will change this man's mind eventually.

At any rate, I'm still going to throw in a new recipe once or twice a week, and when I feel like eating something really weird, I'll make it for lunch.

The blog goes on. Thanks for reading!

Tuesday, June 1, 2010

Day Twenty-Five: Creamy Lemon Squares


Day 25 of Operation: Expand Horizons brings another dessert from Everyday Food- Creamy Lemon Squares from the June 2008 issue.

This simple yet delicious dessert comes together quickly and easily. The crust only has four ingredients: butter, salt, flour, and powdered sugar. The filling has only three: lemon juice, sweetened condensed milk, and egg yolks. After briefly baking the shortbread-like crust, whisked-together filling is poured in and the whole thing gets baked until set. Chill, cut, and dust with powdered sugar, and you have a dessert that's sure to please.

Yum!

Equipment Corner: Mandoline Slicer

I'm not usually one for expensive kitchen gadgets. My husband, however, thought I should have a mandoline slicer and bought me one for my birthday a few years ago. He got me the De Buyer Pro-V Mandoline V Professionelle, which retails for around $230.00. It came with a carrying case, two horizontal slicing blades (one flat and one ridged), and three different sized julienne blades.

This is an item that I thought I'd never use. That all changed when I realized just how great it is. It saves time, creates perfectly even slices, and multi-tasks. You can cut not only slices of varying thickness, but you can make waffle cuts, ridged cuts, and juliennes with precision.

There are other models out there for a lot less money, and I'm sure you can find a decent one for around fifty bucks.


Sunday, May 30, 2010

Day Twenty-Four: Arroz Con Pollo


Day 24 of Operation: Expand Horizons is another recipe by America's Test Kitchen, Latino Style Chicken and Rice, aka Arroz Con Pollo (registration required).

I've eaten Arroz Con Pollo before, as prepared by my amiga puertorriqueña Becky, but I've never cooked it myself. This version is simple, if a little time-consuming. My husband thought it lacked a certain something (maybe spiciness?). However, it was good, and certainly deserved a try.

Thursday, May 27, 2010

Day Twenty-Three: Coconut-Pineapple Loaf Cake


Day 23 of Operation: Expand Horizons brings a tasty dessert- Coconut-Pineapple Loaf Cake from the June 2008 issue of Everyday Food.

This simple dessert comes together quickly and tastes fantastic. I've always loved the combination of coconut and pineapple, and this cake is just right. I would make one small change next time. The recipe calls for toasting all of the coconut, a portion of which is scattered on top of the batter before baking. Because it was already toasted, some of the topping coconut got a bit over-browned for my tastes. Next time, I'll toast the coconut that goes into the batter but leave the topping as is, allowing it to toast while the cake bakes.

This cake is quite tasty the next day as breakfast! :D

Tuesday, May 25, 2010

Temporary hiatus- not to worry!

Operation: Expand Horizons is on hiatus for a few days. My husband and I have both been feeling kinda crappy lately and haven't been in the mood for any new recipes. In fact, I'm lobbying for takeout tonight because I am SO not up for cooking.

Nevertheless, the cooking and photography and blogging will continue soon, pinkie swear!

Sunday, May 23, 2010

Day Twenty-Two: Three Cheese Beer Bread

Day 22 of Operation: Expand Horizons brings a recipe from the food blog Brown Eyed Baker. I'm not sure where she got the idea for Three Cheese Beer Bread, but it was inspired!

This tasty carb-load falls into the category of quick breads, which are risen without the use of regular yeast. This particular bread gets its bubbles from baking powder and 16 ounces of beer. I used a tall can of Coors Light, which was 16 ounces exactly, and just the kind of crisp lager taste that would match well with bread and cheese.

My careful planning left me with not the quite amounts of the required cheeses, so I took small liberties with the types and quantities- adding a little Swiss where I lacked some Gruyère, and a little Butterkäse (a mild, buttery, semi-soft cheese from Germany or Austria) and mozzarella where I lacked some white cheddar.

I took a loaf of this bread to a cookout and it was well received, despite a glaring omission during the mixing of the dough. I made the mistake of talking on the phone for an hour to my darling friend Allison from Eat Well Love Life while I was in the kitchen and accidentally left out the tablespoon of Worcestershire sauce. D'oh!

Nevertheless, the bread was delicious, and next time, I'm sure it will be even better. Thanks to Brown Eyed Baker for her blog and this great recipe. I have a few more of her recipes to recreate over the rest of this Operation.

Day Twenty-One: Multigrain Bread


Day 21 of Operation: Expand Horizons was a baking day. Multigrain Bread from America's Test Kitchen (sign-up required, but the recipe is free for now) was, as promised, easy and pretty good. It toasts nicely and has a good hearty texture and flavor.

My one complaint about this bread is that it was a bit crumbly. Half-inch slices for a sandwich did not hold up well. A bit of internet research indicates that maybe I somehow used too much flour. Perhaps I need more practice with breadmaking!

I used Bob's Red Mill 7-grain hot cereal mix, as indicated in the recipe. I bought salted sunflower nuts instead of unsalted as the recipe calls for. If they were unsalted, I would wind up with a whole bag that none of us would eat, so I reduced the recipe's salt by about half. It seems a worthwhile compromise.

Thursday, May 20, 2010

Day Twenty: Chicken Salad Sandwich


Day twenty of Operation: Expand Horizons was an original mash-up recipe using leftover green chile mayo from the burgers and fries posting a couple of days ago.

I poached a medium-sized chicken breast in water seasoned with some kosher salt, black pepper, dried parsley, and dried chives. Poaching, if you're unfamiliar, is gentle simmering in water and seasonings, usually herbs or other aromatics like onion and garlic. It infuses flavor without causing the tough texture usually imparted by boiling the meat.

I removed the chicken from the cooking water and let it cool briefly before chopping. I also chopped up 1/4 of a Gala apple and two green onions. I mixed the chicken, apple, onion, and a large pinch of slivered blanched almonds with the remaining green chile mayo, seasoned it with salt and pepper, and piled it onto some homemade multi-grain bread with a piece of romaine lettuce.


Delicious!

Day Nineteen: Quick Lemon Mousse


Day nineteen of Operation: Expand Horizons brings a fast and easy dessert from Martha's minions- Quick Lemon Mousse from the May 2010 issue of Everyday Food.

This citrusy, creamy concoction is made up of no more than gelatin, sugar, lemon juice, water, and heavy cream, and is chilled briefly before being served with some berries to balance the tanginess. I would love to have used the blackberries called for in the recipe, but again, my budget dictates my ingredients, and blackberries are about $5.00 for a half pint. No thanks! I had some good (and inexpensive) strawberries, and they were an excellent substitute.

The recipe states it serves 4, but it could have easily served 6 instead, especially when you have plenty of fruit to pair with. The generous portions were a little too much, and the lemony flavor can be a little overwhelming if you eat the whole bowl. Nevertheless, this super fast and elegant dessert is a must for the repertoire of sweets.

Day Eighteen: Spring Vegetable Couscous and Steak Kebabs


Day eighteen of Operation: Expand Horizons offers one new recipe from the May 2010 issue of Martha Stewart's Everyday Food, Spring Vegetable Couscous, as a side dish to some tried-and-true steak kebabs.

I've never tried couscous before, and it was super quick to prepare. The dish itself is simple- asparagus, green onion, frozen peas, parsley, couscous, and water. I really liked it, but my husband, who is season-weary of asparagus, complained about it and also said it had too many peas. I think I might make a variation of this dish as a cold salad, using tabouli wheat (bulgur) instead of couscous. I may even spring it up further by adding some shredded spinach!

The magazine version calls for lemon zest and fresh lemon juice. Knowing our tastes (asparagus may well pair with lemon according to traditional cooking lore, but I find it has too much bitterness), I omitted the lemon and added two small cloves of garlic. The magazine also calls for adding shredded rotisserie chicken to make this a main dish, but that sounded weird to me and I opted instead to make it as a meatless side.


I like to keep frozen peas in the fridge at all times. For one, I got lucky with a youngin who will literally eat peas as a snack. Secondly, the frozen variety are infinitely more tasty than the canned variety. I learned my lesson buying the cheap store brand frozen veggies. There is a noticeable difference in flavor and texture- I now buy either Green Giant or Birds Eye exclusively.

Here's the recipe as it appears in this month's Everyday Food, with my changes noted in italics. I halved the recipe to make it a side for two adults and a 3 year old, and had about a serving left over.

Spring-Vegetable Couscous with Chicken
Serves 4

3 tbsp. unsalted butter
4 scallions, white and green parts separated and thinly sliced crosswise
2 wide strips lemon zest plus 1 tbsp. lemon juice (I omitted in favor of 2 cloves garlic, minced)
coarse salt and ground pepper
1 lb. asparagus, trimmed and cut into 1/2" pieces
1/2 c. frozen peas
1 cup couscous
leg and thigh meat from 1 rotisserie chicken, turn into bite-size pieces (I omitted.)
2 tbsp. chopped fresh parsley

Melt butter in a medium saucepan over medium-high. Add scallion whites (and garlic) and cook, stirring constantly, until softened, about 3 minutes. Add lemon zest and 1 1/4 cups water and season with salt and pepper. Cover pan and bring liquid to a boil, then add asparagus and peas. Return to a boil and stir in couscous. Add chicken and remove pan from heat; cover and let sit 7 minutes. Add lemon juice (I omitted), scallion greens, and parsley and season with salt and pepper. Fluff with a fork and serve.


I have a well-worn recipe my husband found online for a dry rub for steak. It's purported to be like that used by Outback Steakhouse, but whether that's true or not, it's a good mix.

Steak Rub
Makes about 1/2 cup. Mix the following in a small bowl. Sprinkle generously over steak or pork chops about 1/2 hour before grilling. Store leftovers in a sealed container with your spices.

4 tsp. kosher salt
4 tsp. paprika
2 tsp. ground black pepper
1 tsp. onion powder
1 tsp. garlic powder (I use garlic granules, which I think have a more potent flavor.)
1/2 tsp. cayenne powder
1/2 tsp. ground coriander
1/2 tsp. ground turmeric